Opening a window 🟢
Resulting code: step020-next
Before being able to render anything on screen, we need to ask the Operating System (OS) to hand us some place where to draw things, something commonly known as a window.
The process to open a window depends a lot on the OS, so we use a little library called GLFW which unifies the different window management APIs and enables our code to be agnostic in the OS.
Note
I try to use as few libraries as I can, but this one is required to make our code cross-platform, which feels even more important to me than writing code from scratch. GLFW is furthermore a very common choice and quite small in its design.
Headless mode
WebGPU does not require a window to draw things actually, it may run headless and draw to offscreen textures. Since this is not a use case as common as drawing in a window, I leave the details of this option to a dedicated chapter of the advanced section.
SDL
Another popular choice for window management is the SDL library. It is not as lightweight as GLFW but provides more features, like support for sound and Android/iOS targets. A dedicated appendix shows what to change to the main guide when using SDL.
Integration of GLFW
We do not really need to install it, we just need to add the code of GLFW to our project directory. Download the file glfw.zip (780 KB) and unzip it in your project. This is a stripped down version of the official release where I removed documentation, examples and tests so that it is more lightweight.
To integrate GLFW in our project, we add its directory to our root CMakeLists.txt with add_subdirectory(glfw). We add an exception for emscripten because it has built-in support for GLFW; all we need in that case is to set the -sUSE_GLFW=3 link option.
if (NOT EMSCRIPTEN)
    # Add the 'glfw' directory, which contains the definition of a 'glfw' target
    add_subdirectory(glfw)
else()
    # Create a mock 'glfw' target that just sets the `-sUSE_GLFW=3` link option:
    add_library(glfw INTERFACE)
    target_link_options(glfw INTERFACE -sUSE_GLFW=3)
endif()
# In both cases, we can now link to the 'glfw' target
Note
When using Dawn, make sure to add the glfw directory before you add webgpu, otherwise Dawn provides its own version (which may be fine sometimes, but you don’t get to chose the version).
Then, we must tell CMake to link our application to this library, like we did for webgpu:
# Add the 'glfw' target as a dependency of our App
target_link_libraries(App PRIVATE webgpu glfw)
You should now be able to build the application and add #include <GLFW/glfw3.h> at the beginning of the main file.
#include <GLFW/glfw3.h>
Important
If you are on a linux system, make sure to install the dependencies that GLFW require. By default, it tries to build for both X11 and Wayland so you need both sets of dependencies. If you only want to use/install one of them, turn either GLFW_BUILD_X11 or GLFW_BUILD_WAYLAND off when calling cmake, e.g.:
# Build with only X11 support
cmake -B build -DGLFW_BUILD_WAYLAND=OFF
Basic usage
In this section we get familiar with GLFW, without any WebGPU-specific consideration.
Initialization
First of all, any call to the GLFW library must be between its initialization and termination:
glfwInit();
{{Use GLFW}}
glfwTerminate();
The init function returns false when it could not setup things up:
if (!glfwInit()) {
    std::cerr << "Could not initialize GLFW!" << std::endl;
    return 1;
}
{{Create and destroy window}}
Once the library has been initialized, we may create a window:
// Create the window
GLFWwindow* window = glfwCreateWindow(640, 480, "Learn WebGPU", nullptr, nullptr);

{{Use the window}}

// At the end of the program, destroy the window
glfwDestroyWindow(window);
Here again, we may add some error management:
if (!window) {
    std::cerr << "Could not open window!" << std::endl;
    glfwTerminate();
    return 1;
}
Window hints
The glfwCreateWindow function has some optional extra arguments that are passed through calls of glfwWindowHint before invoking glfwCreateWindow. We add two hints in our case:
Setting
GLFW_CLIENT_APItoGLFW_NO_APItells GLFW not to care about the graphics API, as it does not know WebGPU and we won’t use what it could set up by default for other APIs.Setting
GLFW_RESIZABLEtoGLFW_FALSEprevents the user from resizing the window. We will release this constraint later on, but for now it avoids some inconvenient crash.
glfwWindowHint(GLFW_CLIENT_API, GLFW_NO_API); // <-- extra info for glfwCreateWindow
glfwWindowHint(GLFW_RESIZABLE, GLFW_FALSE);
GLFWwindow* window = glfwCreateWindow(640, 480, "Learn WebGPU", nullptr, nullptr);
Tip
I invite you to look at the documentation of GLFW to know more about glfwCreateWindow and other related functions.
Main loop
At this point, the window opens and closes immediately after. To address this, we add the application’s main loop just before all the release/destroy/terminate calls:
while (!glfwWindowShouldClose(window)) {
    // Check whether the user clicked on the close button (and any other
    // mouse/key event, which we don't use so far)
    glfwPollEvents();
}
Note
This main loop is where most of the application’s logic occurs. We will repeatedly clear and redraw the whole image, and check for new user input.
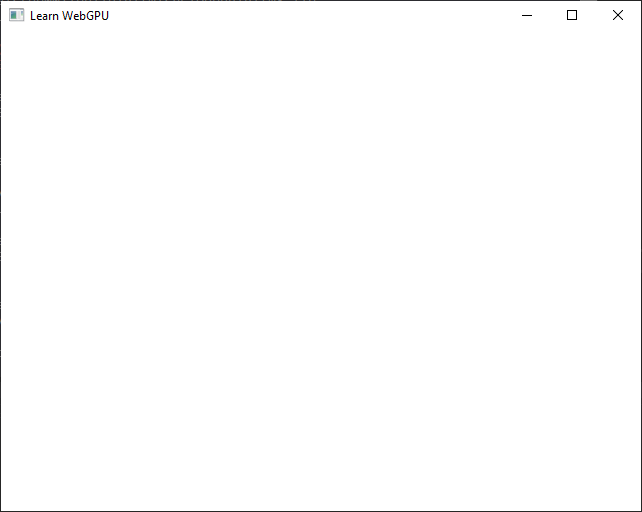
Our first window, using the GLFW library.
Warning
This main loop will not work with Emscripten. In a Web page, the main loop is handled by the browser and we just tell it what to call at each frame. We fix this below while refactoring our program around an Application class.
Application class
Refactor
Let us reorganize our project a bit so that it is clearer about the initialization versus main loop separation and so that is more Web-friendly .
We create functions Initialize(), MainLoop() and Terminate() to split up the three key parts of our program. We also put all the variables that these functions share in a common class/struct, that we call for instance Application. For better readability, we may have Initialize(), MainLoop() and Terminate() be members of this class:
class Application {
public:
    // Initialize everything and return true if it went all right
    bool Initialize();

    // Uninitialize everything that was initialized
    void Terminate();

    // Draw a frame and handle events
    void MainLoop();

    // Return true as long as the main loop should keep on running
    bool IsRunning();

private:
    // We put here all the variables that are shared between init and main loop
    {{Application attributes}}
};
Our main function becomes as simple as this:
int main() {
    Application app;

    if (!app.Initialize()) {
        return 1;
    }

    // Warning: this is still not Emscripten-friendly, see below
    while (app.IsRunning()) {
        app.MainLoop();
    }

    app.Terminate();

    return 0;
}
And we can now move the window and device creation code to Initialize() (and set aside our compute pipeline experiment for now). The only thing that currently belongs to MainLoop() is the polling of GLFW events and WebGPU device.
While moving bits of code, turn all variables that are shared acros methods into class attributes (which are declared in the class Application { /* ... */ } block).
Important
To help the reader distinguish class attributes (a.k.a. member variables) from local variables, I will always prefix them with m_ (as in “member”). This is one of the many naming convention tout one may encounter.
bool Application::Initialize() {
    // Move the whole initialization here
    {{Initialize}}
    return true;
}

void Application::Terminate() {
    // Move all the release/destroy/terminate calls here
    {{Terminate}}
}

void Application::MainLoop() {
    glfwPollEvents();
    wgpuInstanceProcessEvents(m_instance);
    //                        ^^ We add this prefix to member variables

    {{Main loop content}}
}

bool Application::IsRunning() {
    return !glfwWindowShouldClose(m_window);
}
Caution
So do not move the emscripten_sleep(100) line to MainLoop(). This line is no longer needed once we let the browser handle the main loop, because the browser ticks its WebGPU backend itself.
Feeling lost? Unfold this for details about what to rewrite.
Here I systematically list all the changes needed for this refactoring. Do not hesitate to activate more Literate Options on the right-hand side of this page in order to better see how to connect these code blocks.
Alternatively, you may look at the Resulting code: step020-next.
// Main loop is empty for now
{{Open window and get adapter}}

{{Request device}}

// We no longer need to access the adapter
wgpuAdapterRelease(adapter);

// The variable 'queue' is now declared at the class level
// (do NOT prefix this line with 'WGPUQueue' otherwise it'd shadow the class attribute)
m_queue = wgpuDeviceGetQueue(m_device);
// Open window
glfwInit();
glfwWindowHint(GLFW_CLIENT_API, GLFW_NO_API); // <-- extra info for glfwCreateWindow
glfwWindowHint(GLFW_RESIZABLE, GLFW_FALSE);
m_window = glfwCreateWindow(640, 480, "Learn WebGPU", nullptr, nullptr);

// Create instance ('instance' is now declared at the class level)
m_instance = wgpuCreateInstance(nullptr);

// Get adapter
std::cout << "Requesting adapter..." << std::endl;
{{Request adapter}}
std::cout << "Got adapter: " << adapter << std::endl;
std::cout << "Requesting device..." << std::endl;
WGPUDeviceDescriptor deviceDesc = WGPU_DEVICE_DESCRIPTOR_INIT;
{{Build device descriptor}}
// NB: 'device' is now declared at the class level
m_device = requestDeviceSync(m_instance, adapter, &deviceDesc);
std::cout << "Got device: " << m_device << std::endl;
wgpuQueueRelease(m_queue);
{{Destroy surface}}
wgpuDeviceRelease(m_device);
glfwDestroyWindow(m_window);
glfwTerminate();
Once you have moved everything, you should end up with the following class attributes shared across init/main:
// All these can be initialized to nullptr
GLFWwindow *m_window = nullptr;
WGPUInstance m_instance = nullptr;
WGPUDevice m_device = nullptr;
WGPUQueue m_queue = nullptr;
Note
The WGPUAdapter is an intermediate step towards getting the device, that may be released in the initialization.
New files
Includes
Although we could keep everything in the same file, it is common practice to place such an Application class in a dedicated pair of files, with declarations in Application.h and definitions in Application.cpp.
#pragma once
{{Includes in Application.h}}

{{Application class}}
The header file include as little files as possible, namely only what is needed to define the Application interface. In our case, we only need what defines WebGPU objects and the GLFWwindow *window pointer, and since the latter is a pointer, we can get along with only forward-declaring the struct GLFWwindow:
// In Application.h
#include <webgpu/webgpu.h>

// Forward-declare
struct GLFWwindow;
Note
Forward declaring means “a struct with this name will exist by the time you link the program”, and it thus allows to manipulate references and pointers to this struct, as long as we do not try to call any of their members. The compiler indeed only need to know “its a pointer” to allocate its memory.
The implementation file Application.cpp may include more things, and importantly start by including the Application.h file:
// In Application.cpp
#include "Application.h"
#include "webgpu-utils.h"

#include <GLFW/glfw3.h>

#include <iostream>
#include <vector>
And since main.cpp also use the Application class, it also includes the header:
// In main.cpp
#include "Application.h"

#ifdef __EMSCRIPTEN__
#  include <emscripten.h>
#endif // __EMSCRIPTEN__
{{Includes}}

{{Main function}}
CMake
As we have seen with webgpu-utils.cpp, when we add new .cpp files we must add them to the list of sources in the CMakeLists.txt. The .h files are not mandatory in this list, but it is convenient to list them so that IDEs can better integrate them:
Application.h
Application.cpp
Emscripten
As mentioned multiple times above, explicitly writing the while loop is not possible when building for the Web (with Emscripten) because it conflicts with the web browser’s own loop. We thus write the main loop differently in such a case:
#ifdef __EMSCRIPTEN__
    {{Emscripten main loop}}
#else // __EMSCRIPTEN__
    while (app.IsRunning()) {
        app.MainLoop();
    }
#endif // __EMSCRIPTEN__
int main() {
    Application app;

    if (!app.Initialize()) {
        return 1;
    }

    {{Main loop}}

    app.Terminate();

    return 0;
}
Here we use the function emscripten_set_main_loop_arg(), which is precisely dedicated to this issue. This sets a callback that the browser will call each time it runs its main rendering loop.
// Signature of 'emscripten_set_main_loop_arg' as provided in emscripten.h
void emscripten_set_main_loop_arg(
    em_arg_callback_func func,
    void *arg,
    int fps,
    int simulate_infinite_loop
);

// Callback type takes one argument of type 'void*' and returns nothing
typedef void (*em_arg_callback_func)(void*);
We can recognize the callback pattern that we used already when requesting the adapter and device, or setting error callbacks. What is called arg here is what WebGPU calls userdata: it is a pointer that is blindly passed to the callback function.
// Equivalent of the main loop when using Emscripten:
auto callback = [](void *arg) {
    //                   ^^^ 2. We get the address of the app in the callback.
    Application* pApp = reinterpret_cast<Application*>(arg);
    //                  ^^^^^^^^^^^^^^^^ 3. We force this address to be interpreted
    //                                      as a pointer to an Application object.
    pApp->MainLoop(); // 4. We can use the application object
};
emscripten_set_main_loop_arg(callback, &app, 0, true);
//                                     ^^^^ 1. We pass the address of our application object.
The extra arguments are recommended to be 0 and true:
fpsis the framerate at which the function gets called. For better performance, it is recommended to set it to 0 to leave it up to the browser (equivalent of usingrequestAnimationFramein JavaScript)simulate_infinite_loopmust betrueto preventappfrom being freed. Otherwise, themainfunction returns before the callback gets invoked, so the application no longer exists and theargpointer is dangling (i.e., points to nothing valid).
The Surface
It is now time to connect our GLFW window to WebGPU. This happens when requesting the adapter, by specifying a WGPUSurface object to draw on:
{{Get the surface}}

WGPURequestAdapterOptions adapterOpts = WGPU_REQUEST_ADAPTER_OPTIONS_INIT;
adapterOpts.compatibleSurface = m_surface;
//                              ^^^^^^^^^ Use the surface here

WGPUAdapter adapter = requestAdapterSync(m_instance, &adapterOpts);
How do we get the surface? This depends on the OS, and GLFW does not handle this for us, for it does not know WebGPU (yet?). So I provide you this function, in a little extension to GLFW3 called glfw3webgpu.
GLFW3 WebGPU Extension
Download and unzip glfw3webgpu.zip in your project’s directory. There should now be a directory glfw3webgpu sitting next to your main.cpp. Like we have done before, we can add this directory and link the target it creates to our App:
# After adding glfw and webgpu directories:
add_subdirectory(glfw3webgpu)
# After defining the App target:
target_link_libraries(App PRIVATE glfw webgpu glfw3webgpu)
target_copy_webgpu_binaries(App)
Note
The glfw3webgpu library is very simple, it is only made of 2 files so we could have almost included them directly in our project’s source tree. However, it requires some special compilation flags in macOS that we would have had to deal with (you can see them in the CMakeLists.txt).
You can now get the surface by simply doing:
// In Application.cpp
#include <glfw3webgpu.h>
m_surface = glfwCreateWindowWGPUSurface(m_instance, m_window);
Important
The surface lives independently from the adapter and device, so it must not be released before the end of the program like we do for the adapter and instance. It is thus defined as a class attribute of Application:
WGPUSurface m_surface = nullptr;
Also don’t forget to release the surface at the end, in the Terminate() method:
wgpuSurfaceRelease(m_surface);
Conclusion
In this chapter we set up the following:
Use the GLFW library to handle windowing (as well as user input, see later).
Refactor our code to separate initialization from main loop and introduce the
Applicationclass.Connect WebGPU to our window using the glfw3webgpu extension.
We are now ready to display something on this window!
Conclusion
Resulting code: step020-next